Finished Project!
I started out by going to the store to get the supplies. Luckily Joann's had their canvases on sale for 50% off!! (so I bought a pack of 3... thought I could do this as a gift for others as well). I also bought paint, a coarse paint brush, sponge brushes, and candy :). I love that I can use the Joann's App to get coupons as well! SCORE!
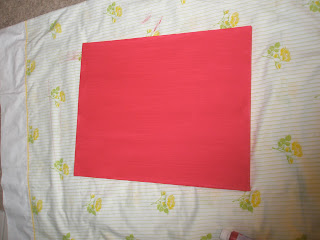
Once I got home, I laid out my messy cloth and painted the canvas red with the coarse brush. I wanted to be able to see the brush strokes. HELPFUL TIP: I took a plastic container and placed it inside a Ziploc bag then put the paint inside it. No clean up!
After that, I tore out the pages of an old (falling apart and much loved) Cat in the Hat book.
From there I went to my computer and researched quotes from Dr. Seuss to use. There are so many good ones that I could not decide. I gave my hubby 3 choices to choose from. He said, "You're not going to actually use the one I pick anyways, so what does it matter?" Therefore, I had to use his choice. Which I like anyways or I wouldn't have given him the option. :)
I typed the quote into Word and selected a font that I liked and that I thought I could replicate.
From there, I cut out groups of verse from the Cat in the Hat pages that I had torn out. I also cut out the words that I had printed off from the computer.
Now, to figure out how to get the words from the printed page to the pages from the book. I think that I have pretty neat handwriting but I didn't want it to be in my handwriting. SO, I came up with an inventive solution. I used a 9x13 clear baking dish and and light that would shine through the side to create a light box. Of course, if you have light box, use it!
I then placed each word onto different parts of the book and very carefully traced the letters using a Sharpie marker. I didn't do the words in order, I tried to make sure that they fit well on the parts of the book that I had cut out.
After all of the words were traced, I went back to the canvas and took some blue paint and embellished the edges. I didn't want the painting to be too red.
Then I took a break from the project to start this blog post and look at the inspiration project again. At this point, I decided to test out the Sharpie markings to see if the Mod Podge would make it bleed. Thankfully it did not so I decided it was ok to start mod podging the words onto the canvas. I laid out the words where I wanted them and then glued each one individually. I covered the entire back with Mod Podge so that the edges would be sure to stick.
I printed off some starts to cut out and see how they looked.... I like them so I traced the stars that I cut out, then painted them onto the canvas.
Here is the canvas with the stars painted on.
Once the paint dried, I covered the entire canvas in Mod Podge. I wanted to make sure that the words were sealed all the way.
Here is the finished project again!


Very cute! Makes me want to do one for our house or Elliott's room.
ReplyDelete